Wednesday, September 10, 2014
New Stamp Company!
We sell digital stamps paired with studio files that will cut your digital stamps out with a silhouette machine! (You don't need a Silhouette to use our digi stamps the Studio files are just a bonus for buying our digis!) In addition to our fabulous digital stamps we also have wonderful laser etched rubber stamps!
Our Grand Opening will begin next Monday, Spet. 15th with a blog hop that will start on our Challenge blog. Please stop by and take the hop! There will be some free stamps given out and a lot of inspiration to be had! We will also be issuing challenges throughout the next 3 weeks! Also, stop by our new Facebook Group and join us we will be giving away free digis for every 100 people who join and we plan to keep the group a happin' place to be!
I hope you are all well and healthy! Here's to a wonderful Fall season, my favorite time of year. Lots of love coming your way.
Vikki
Sunday, November 18, 2012
Happy Birthday QKD!!
Monday, October 8, 2012
Too Cute!
Sunday, October 7, 2012
Pumpkins!!!
Saturday, October 6, 2012
Spoooky Flowers!
Flowers.. Flowers.. Flowers.. I love making my own paper flowers! I had an empty frame and a post card sitting on my desk so I thought why not frame the post card and embellish with some hand made flowers?? then I thought.. hmm.... add some wings! Then... I got the idea to use vellum for the wings but alas, after an hour of looking for just a scrap of vellum, I couldn't find ANY! Not 1 stinkin scrap! So, I had some thick frosted plastic... I said to myself "Why not?" And away I went! I pulled out the handy dandy Black Stazon ink and my Delicate Wings Stamps and went to work! I used some teeny tiny rhinestones to dress up the wings and viola! My framed art was finished.
Thank you for visiting my blog today! Please hop over to Beth's blog and see what she's got up her sleeves for you.
Friday, October 5, 2012
Moonlit Misery is Orange!
Thursday, October 4, 2012
Ol' Bag O' Bones!
Wednesday, October 3, 2012
To make this card cut a piece of black cardstock and adhere it to the front of a card base. cut and mat pink and orange patterned cardstocks to the front of your card. (to do this I just cut rectangles of each color 4"X 5.25" and cut them diagonally) Next take a strip of black cardstock and use a border punch to make the banner points. adhere to your card front.
Stamp and color your Day of the Dead girl image and mat with black cardstock. Adhere to front of card with pop dots. Apply rhinestones and crystal lacquer as desired!
Thanks for visiting me today! Please surf over to Janie's blog for your next stop!
Tuesday, October 2, 2012
It's a purple kinda day!!
Monday, October 1, 2012
Decorate a Coffin Contest and Blog Hop!!
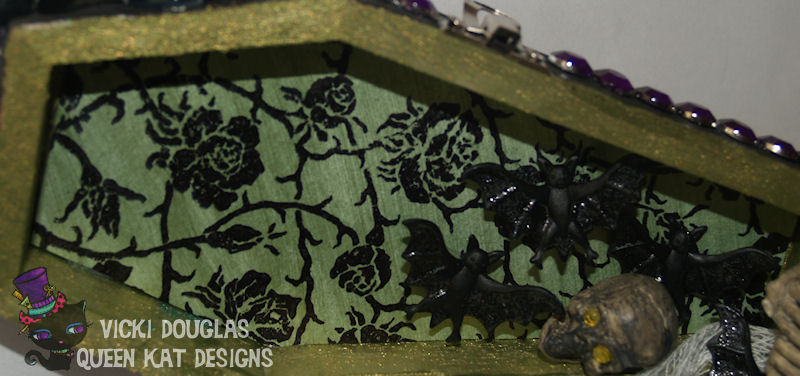
Thanks for stopping at my blog today! We are hosting a contest beginning today to see who is the best coffin decorator! Do you think you have what it takes? Well lets find out! I am challenging you to a fun contest. Check out this awesome coffin that SierraGrannie did! (the green and black one above is my creation)
Here are the details:
Decorate a Coffin (can be wood or chipboard: handmade or store bought ie.. Michaels has wood ones for $1.00)
Use at least 1 stamped image somewhere in or on your coffin. The stamped image must be visible when the coffin is on display.. (Here's a close up of my stamped image. I used the Thorns Background stamp for my Coffin lining.)
Any stamps, colors, embellishments, themes, and textiles are ok! Use your skills, I know you have mad decorating skills! Lets see them! Here are more shots of Sierra Grannie's coffin...
1st Place Prize: $25 Gift Certificate to Queen Kat Designs
2nd Place Prize: $10 Gift Certificate to Queen Kat Designs
When your coffin is finished, link me to it using the Mr. Linky below! Entries are due by October 20th. Public voting will open Oct 22nd and close Oct 26th! The winner will be announced on October 27th! You get 1 entry per person.
Sunday, September 30, 2012
Cut a piece of cardstock to fit the card front. Cut a piece of ledger patterned paper and stamp a QKD background stamp on it and adhere to a piece of black patterned paper. Using metallic thread, attach 1/2 of a snap.
Stamp and color the Evolution stamp on white cardstock, using Vintage Photo Distress Ink and water in a mini mister create the background around the Evolution face. Spritz the entire piece with glimmer mist. I used my home made spray (hair spray with pearl ex). Mat on black and bronze cardstock. Attach other half of snap with metallic thread. Using a brad, attach a game pointer to your Evolution image. Using your favorite adhesive put your card together.
I hope you enjoyed my card today. I had a lot of fun making it. Please hop over to Janie's Blog for your next stop on our 13 Days of Halloween Blog Hop!
Thursday, August 2, 2012
Creative Edges Blog Hop!
Monday, October 31, 2011
Happy Birthday QKD!!
The stamp on this card, YES! It's only 1 stamp. :) It's a new background stamp that's coming out tomorrow at our stamp release party. I think I'll name it falling stars. I originally thought of it for a Christmas stamp but I'm lovin how it turned out for a Birthday card! the silver is my silver sailor pen and the dots that look kinda black are actually purple rhinestones. The whole card just blings in real life! :)
The resist I used on this card was versamark. I used my VM pad to stamp my background stamp then applied the Seedless Preserve ink over it.
I hope you like my card and will come check out the 19 day birthday celebration we have going on. There's lots and lots of fun stuff! It's over on our Facebook Fan Page.
Your next hop stop is... Kerry!
Have a happy day!
Tuesday, September 13, 2011
Changing It Up!
So you have a bunch of old patterned paper you don't like.. But you can't bring yourself to get rid of it.. I say stamp it! I got this idea from Jennifer McGuire in her Inspiration Showcase class. I've done this quite a bit before and before I even knew about Jennifer or her class. But She reminded me of it. :) You know how it goes, you do something 1 time then you file it in the back of your head and need a nugde to pull out that "file" again? So.. here's how I made this card:
Take some patterned paper and use one of the new large background stamps from Queen Kat Designs. here's a link. I used Vintage Photo distress ink and stamped it onto some patterned paper and adhered it to my card front.
I then stamped another background and cut out part of the image, matted it and added it to the front of my card. Using a cuttlebug flower set I got about a year or so ago I made a little flower out of white cardstock and inked it with Wild honey distress ink. I added a rhinestone in the middle with some Glossy Accents and I punched the leaves out of the patterned paper (before it was stamped) Added ribbon and the flower to the front of the card and I was done! :)
Now you go try it! :)