Wednesday, November 3, 2010

It's new stamp day!

Hello again bloggers! Wow 2 days in a ROW? That's got to be a record for me!! lol!

I'm here with some new stamps from QKD today!! They are from our new stamp designer, Valarie Wade. Yeah, you may have seen her at other stores, but we have her now and the designs she's sending me are just as cute as a button!!

Here's a card I made with the Christmas Kitties stamp set. This little kitty makes me wanna snuggle with my zoo of cats. :) She's so cute and fuzzy. I used my tombow markers to color her up and I'm kinda happy with the way she turned out. I'm not a pro at coloring with markers by any means but I think it's cute. :) I used white floc on her hat brim and poof. and then some tan flock on her tail.

I busted out my lil Jamone sewing machine for this card, that thing is soooooo noisey!! If I'd have known it I wouldn't have bought it but it is a little bit more portable than my trusty Singer. I love sewing on cards. I dont know why I dont do it more. I used some nestibility scalloped circes and then pierced some holes in the scallops with my paper piercer. Added some stickles to the "envelope flap" and viola it was done!

Come over and check out the rest of the new stamps!! We have kicked off the holiday crafting at QKD, you can too!

Happy Stamping!
Vicki

Tuesday, November 2, 2010

New Stampies!!

Hi bloggers!!


It's so good to be back in action and I'm happy to announce that I'll be here every week at least this month with a blog post!! I promise!!!! If I'm not I'll have to just delete my blog. lol


Today I'm elated to be on the Queen Kat Designs blog hop! I have a new stamp from Shannon Rene' at Lolli Pop Lab Studios here at QKD! It's called the 3 Kings. And it's super cute! Shannon you are my idol today!! these cutie pies are so fun to stamp with.

First let me share the sketch that I was challenged to use this week by my very good friend, Shannon Hawakins.. who BTW just got married.. Congrats girly!
This is the brightest Christmas card I think I've ever made! I got this pack of paper from Hobby Lobby like 5 years ago and haven't really used it much and I just thought it looked fun with the penguins!
I used my new IRock thingy from... ok so the name of the company escapes me at the moment! I have to say I wasn't sure I'd like it but I'm a total gadget head and have to have the latest in handheld tools. :) The stones are expensive but they are nice to work with and very clean!! no messy glue.

Anywho... what do you think of the penguins??? Let me know and I'll draw for a winner of 1 at the end of the week. The stamp will be available for purchase tomorrow at the QKD store.

Take care and please visit Roni Johnson next on our amazing blog hop!!

Happy Stamping!! And GO VOTE!!! Your vote counts!
Vicki

Wednesday, October 13, 2010

Lolli Pop Labs Blog Hop by QKD

Greetings bloggers!! If you've come from Chris' blog you're on the right track for the new stamp release blog hop! If not, please start back at the QKD blog for all the fun creations.


I'm so proud to be on this blog hop today with some of the best stampers out there! The gals on this hop really inspire me and I'm happy to be amongst their talent today. Today I'm here to share a new stamp with you from our new collection called Lolli Pop labs at QKD. This little gal is "Lady in Waiting!

I love this stamp!! I am having a great time coloring her up in different ways. Isn't she a hoot?? For this card, I added a black piece of cardstock to the front of a white card base then embossed a piece of pink cardstock and punched the edges with an EK Success edge punch and adhered it to the front of the card.

Next, I cut a strip of some velvet paper and punched the edge of the paper and layered it to the front of the card. Then I added some ribbon to that. I stamped my image and colored it, matted it on some purple cardstock and pop dotted it to the front of my card. Then for fun I added some glitter glue to the toilet and toilet paper. :)
This is just a close up of the image. :) I laugh each time I see this image!! I hope you'll continue on the hop with us today. Please visit Katrina's blog next.

Have a happy stampy day!

Saturday, October 9, 2010

We have a winner....

and she is...


Congrats! pjritsema is the winner of the Autumn stamp set from Queen Kat Designs from the blog hop this past week.

Congrats. Please send me your mailing address and I'll have it shipped right out! info @ katstamps . com

Thank you to everyone who participated in the blog hop it was a blast to see all your creations!

Thursday, October 7, 2010

Public Blog Hop Today!

Hey there bloggers! I'm here with the public blog hop for Queen Kat Designs. If you haven't come for the hop, please stop by the QKD blog and start the hop over. There's lots of fun things to see. the theme for today is Fall. So I made a fun Fall card to share. I used last year's November Get Inked! Kit stamps drawn by Irene Tan for the card.


I'm going to be releasing these stamps today at the QKD store in honor of the Fall Blog hop! Leave a comment here and you'll be entered to win this set for FREE! Tell me what you love about Fall, and if you don't like Fall, what's your favorite season and why.

Thanks for coming!! The next stop on your hop is.. Kat Blue

Happy Hopping!

The entire hop order is:
Queen Kat Designs: http://qkd.blogspot.com/
Shannon Hawkins: http://shannonssentiments.blogspot.com/
Jenny Johnson: http://www.crazyaboutcricut.blogspot.com/
Whimsical Ink Sorority: http://whimsicalinksorority.blogspot.com/
Jessica Griffin: http://www.canyoupixelthis.com/
Vicki Douglas: http://qksc.blogspot.com/ -- You're here!
Kat Blue: http://www.kateblue.blogspot.com/
Jeanie Dickinson: http://jeaniesdesigns.blogspot.com/
Dark Ink Sorority: http://darkinksorority.blogspot.com/
Charlene Cundy: http://ccundy.blogspot.com/
Loretta Rodger: http://www.msrhetta.blogspot.com/ - Please note that Loretta is out of town and can not ammend her hop order and we had someone drop out at the last minute. Please visit Bonnie after Loretta. Thank you.
Bonnie Rose: http://alifeunrehearsed2.blogspot.com/
Jill: http://thescrapoholic.blogspot.com/
Nina Patena: http://pasigmom.blogspot.com/
Kapree Clark: http://craftyvamp9.blogspot.com/
Ibis Arrastia: http://smilesbyibis.blogspot.com/
Penny Hartley: http://penny-randomthoughts.blogspot.com/
Nancy Yankowski http://thetrinketcollector.blogspot.com/
Shaunery Wharton http://shaunerysblog.blogspot.com/
Terri Sproul: http://terrisproul.blogspot.com/
Lara Bandanas: http://youwantthecookie.blogspot.com/

Wednesday, October 6, 2010

Thank You to my Royal Court

I would like to take a moment to that the Royal Court at Queen Kat Designs for all of their help this past year. It's been a huge struggle for me to keep things floating here while trying to help my family. The Royal Court has taken on a lot of extra work that normally shouldn't be their job but without any groans or grumbles they constantly emailed me and asked if there was something I needed help with.

I can not tell you what an amazing group of women the court is.. I would like to give props to:
Jules Diley.. our fearless leader
Penny Hartley
Shannon Hawkins
Nina Patena
Wynneth Happer
Lara Badanas
Roni Johnson
Alex Lundgren.. who's leaving on Oct 31st
Meredith Winston.. a former member of the team

Thank you from the bottom of my heart for all you have done and some of you continue to do for me and the company. I'm proud to have you!

Vicki

Thursday, September 16, 2010

I'm alive

hi blog readers.. I'm not sure how many of you are still with me it's been almost 3 months since my last post. As you know my dad has been battling multiple cancers for the last 3 years. on August 5th at 2:39pm we said goodbye for the last time. He was in so much pain at the end. I'm so thankful that hospice came in to help the last 2 weeks. I know you don't personally know my dad but let me tell you a little bit about him.. My dad, Scott Douglas was the most caring loving person I've ever met. He was in the Air Force and later became a machinest owning his own business for almost 20 years. He was a competition shooting champion holding some state records in Utah. We loved to spend time together laughing and doing things like camping, fishing and just plain old hanging out.

My dad was 49 when he passed away. He was only a month and half from his 50th birthday. Next week on the 22nd we will celebrate his birthday.

I'm sorry you guys.. I just can't write anymore. Once I pulled up the picture I started crying and I can't seem to stop. I haven't seen this picture in a couple years. This was taken in October 2007 after we shut down his machine shop because that's what caused his cancer.

I hope to be back to blogging soon. I need an outlet. For now take care and be safe.

Vicki

Tuesday, June 22, 2010

Not again!

Wow time has flown by me! I haven't blogged in so long. I'm very sorry to my followers. This past month has brought some real highs and lows... As you know my dad is fighting multiple types of cancer right now... I found him in a confused state and not breathing right in early june. He was taken to the hospital and spent a little over a week there. He has been diagnosed with blood clots in the lungs and in his back. I almost lost him. They say if I hadn't found him when I did he'd be gone. I'm so thankful for the gift I've been given with my dad.
The good news.....
Queen Kat Designs is coming out with a new line... It's a fun and funky collection of all my favorite things... distressed, rock n roll, industrial and graffiti. The collection includes DIY distress stamps that you can use to distress things that aren't distressed already like this flower....

For this pretty blue flower I used the new Tattered Floral die cut from Tim Holtz.. I glued pages from an old book to some chipboard and cut them out. I stamped them with one of the new distress stamps and inked them up with Broken China and Faded Jeans distress inks. I've been making my own paint daubbers lately and used one of them here. It's kind of a brassy red. I think the correct name is Ruby Red Metallic.. (I'll blog them soon)

Then I just free hand cut the stem and leaves and used Crushed Olive distress ink to color them up.

I will have more sneek peeks for the new Studio 77 line soon. The whole collection (the beginning of the collection anyway) will be released on July 7th with the rest of the CHA releases.

Stop by and save up to 60% now at QKD.

Till next time,
Vicki

Thursday, May 20, 2010

Diamond, Diamond- lie to me baby

Welcome!!! I'm so excited to share this card with you today. She's a bling princess if I ever did see one.
This is one of our new releases in the "Sin Bonnet Sue" Collection. I've used some icey colors on this card with lots of bling. The purple background is actually metallic cardstock that's been embossed with the Cuttlebug Diamond Plate embossing folder.

And as I said on Monday's post, I am showcasing the bracket template I made... Well ok... now that I look at it, this is a different bracket than I used on Monday... But hey, it's a bracket. lol. The blue paper is from Pink Paislee I believe. I hand dyed the lace on this card as well. I used the Dusty Concord Distress Ink and my foam applicator for this lace.

The saying on this card just cracks me up: "Diamond, Diamond in my hand... how much money will you command? Like she's a diamond mafia momma. :)

Now hop over to Shannon as she reveals another new release.

Sunday, May 16, 2010

New Stuff...

Hi guys!! long time no blog.. I'm so bad at this blogging thing! I really wish I could find that 25th hour. Anywhoo.. I'm here now. I have a new QKD release to share with you. I surprised everyone, even the Royal Court today with a new release by Che! She's called Seraphim and she's a "paper doll" stamp. The set includes: a parasol, bunny, shirt, skirt, dress, top hat, Seraphim and 2 hair bows! I had a lot of fun making this card. I hand dyed the laces, I sanded some cardstock, got inky, sparkley and topped it all off with some metallic silver cording that used to be in my grandmothers sewing stuff! What more can you ask for in 1 card??? How about a shaped edge??

I made a template a while ago for this "bracket" like edge and I've used it quite a few times now and each time it looks different! You'll see on Friday another way to use this template as well. So make sure you come back here on Friday! We are releasing 10 new stamp sets and having a special court blog hop.

Until then... Happy Stampin'
Vicki

Friday, April 23, 2010

And the SECRET is...

Hi Stampers!
Queen Kat Designs is proud to announce that we are changing our stamps from clear polymer to Grey laser etched rubber! That's right, REAL rubber stamps!! I am so excited, I've been chomping at the bit driving all my Facebook friends nuts with hints it's unreal.

This move comes for a couple of reasons.. #1 I can acheive more deatil in our stamps with a laser machine that I ever could with polymer. and #2 Health risks. Unless I catch myself on fire with the new machine, there's no health risks for me in making the stamps where as submerging my hands 6-9 hours a day in photopolymer and breathing the fumes didn't do me any good.

The Royal Court is so STOKED for this change they can not wait to get to work with the stamps. The machine just arrived yesterday and I'm still setting it up. I plan to have the rubber stamps in the store and starting to ship on May 1st just in time for National Scrapbook Month.

The stamps will be unmounted and will come in sets or sold as singles as we've always done it. No changes there. :) We will sell EZ Mount foam for you to mount your stamps on. It's on order and hopefully will be here sometime next week.

So... right now, ALL QKD stamps left in stock are 50% off! Come and take advantage of the sale and clear us out of clear stamps to help make room for the rubba!

There's still part of the secret that it under wraps that only 1-2 people know about.. I'm still working on the product but it'll be announced soon and will be shipping May 1st as well!

If you have any questions, please feel free to let me know!

until next time.. Queen Kat

You're probably wanting to see the difference in the stamps, huh?? Can you guess which is rubba and which is clear polymer?

Thursday, April 22, 2010

Busy!

Wow!! I can't believe this month is almost over and I've blogged once! Man I'm bad!! Well.... I've been keeping a HUGE secret that has to do with Queen Kat Designs and I'm just going to blurt it out soon if Friday don't come!! There are only a small handful of people who know and they are bursting to tell too. :) But I've sworn them to secrecy. Please come and join in the fun over at the castle. We've moved and I'm going to spill the news there first on Friday, so be one of the first to know and come join us! Here's some news I just put on the QKD blogs..

Come over to the QKD Contest blog and vote for your favorite card. Each month we have a card contest with a great prize. Since April is our birthday month for the Royal kit we are giving the winner a mini kit made up of things from our great royal kits!Also....

Come over and shop the QKD clearance sale. We are clearing out ALL of our stamps to make room for new ones. Don't be frightened, we are going no where! We are just turning up the greatness!

ALL stamps are 30% off!! Shop now for the best selection.

Have a fantastic stampy day!
Queen Kat

Sunday, April 4, 2010

Enamel Flowers

Hey there! Happy Easter.

I hope you had a wonderful day. Mine was filled with family and nummy food. Last night I ran down to get a Melting Pot from Michael's so I could try some of Suze Weinberg's techniques... She's the guest designer for Queen Kat Designs for the month of April. :) I was watching some you tube vids last night and came across one that made these pretty flowers using Prima's and UTEE in the melting Pot. So today I melted up some UTEE and made me some flowers! Here's my finished product...
I just dipped them into the UTEE face down and swirled them around with a bamboo skewer and used tweezers to take them out then cooled them down on my craft mat. It's very simple to do. These pictures do no justice what so ever! If I have some free time this week, I will make a video of how to do it. They shimmer and shine and are oh so pretty. Here are some more shots...
The teal flower was used on my Dad's Easter card. I want to try the technique using other colors to make them more vintage looking. I am waiting for the new Petaloo Color me silly white flowers to come out in stores so I can ink them up with the new Timmy inks. Oh I can see so many possibilities with them and my melting pot.. :)
Until next time...

Thursday, April 1, 2010

It's Blog Candy Time!

Thanks to everyone who chose to enter my blog candy here. It's now closed. Although I only reached my 150 follower goal on Facebook's Networked Blog thingy, I'm going to still hand out 2 candies!! I'm going to pick randomly from the followers of my blog. If you're the lucky winner, please email me at info@katstamps.com with your address and I'll get it sent out ASAP. Drum Roll please meistro.....

Networked Blog Winner: Jodi Burkhart Neal

Blogger Winner: Jessica Buike

How were the winners chosen? Point n click. I pulled up lists of my followers and closed my eyes, pointed and who I clicked on first won. :)

I woulda used the random.org but each time I pull up the list the followers end up in a different order so that didn't work out.

Thank you all for entering. I hope you'll keep following me and enjoy all of the crafts n things I have to share.

Take Care!
Vicki

Thursday, March 25, 2010

Lets Get Inky!

As promised.. Here's my tutorial on how to make your own custom dyed ribbon...
Supplies:
Hug Snug Seam Binding
ReInker (any kind will do)
Mini mister
Water
Non Stick Craft Sheet
Plastic Baggie
Paper Towel and extra water for clean up

Step 1: Put about 10 drops of reinker into your mini mister (If using a Distress Ink Reinker use 1 full eye dropper of ink) fill the rest of the mister up with plain water just to the bottom of the threads on the bottle to allow enough room for the mister tube to displace the water when cap is on. Screw cap on and shake it baby! you now have your own dye.

Step 2: take your seam binding (I work with pieces that are 2 yards long) and lay it on your craft sheet. And spray away...
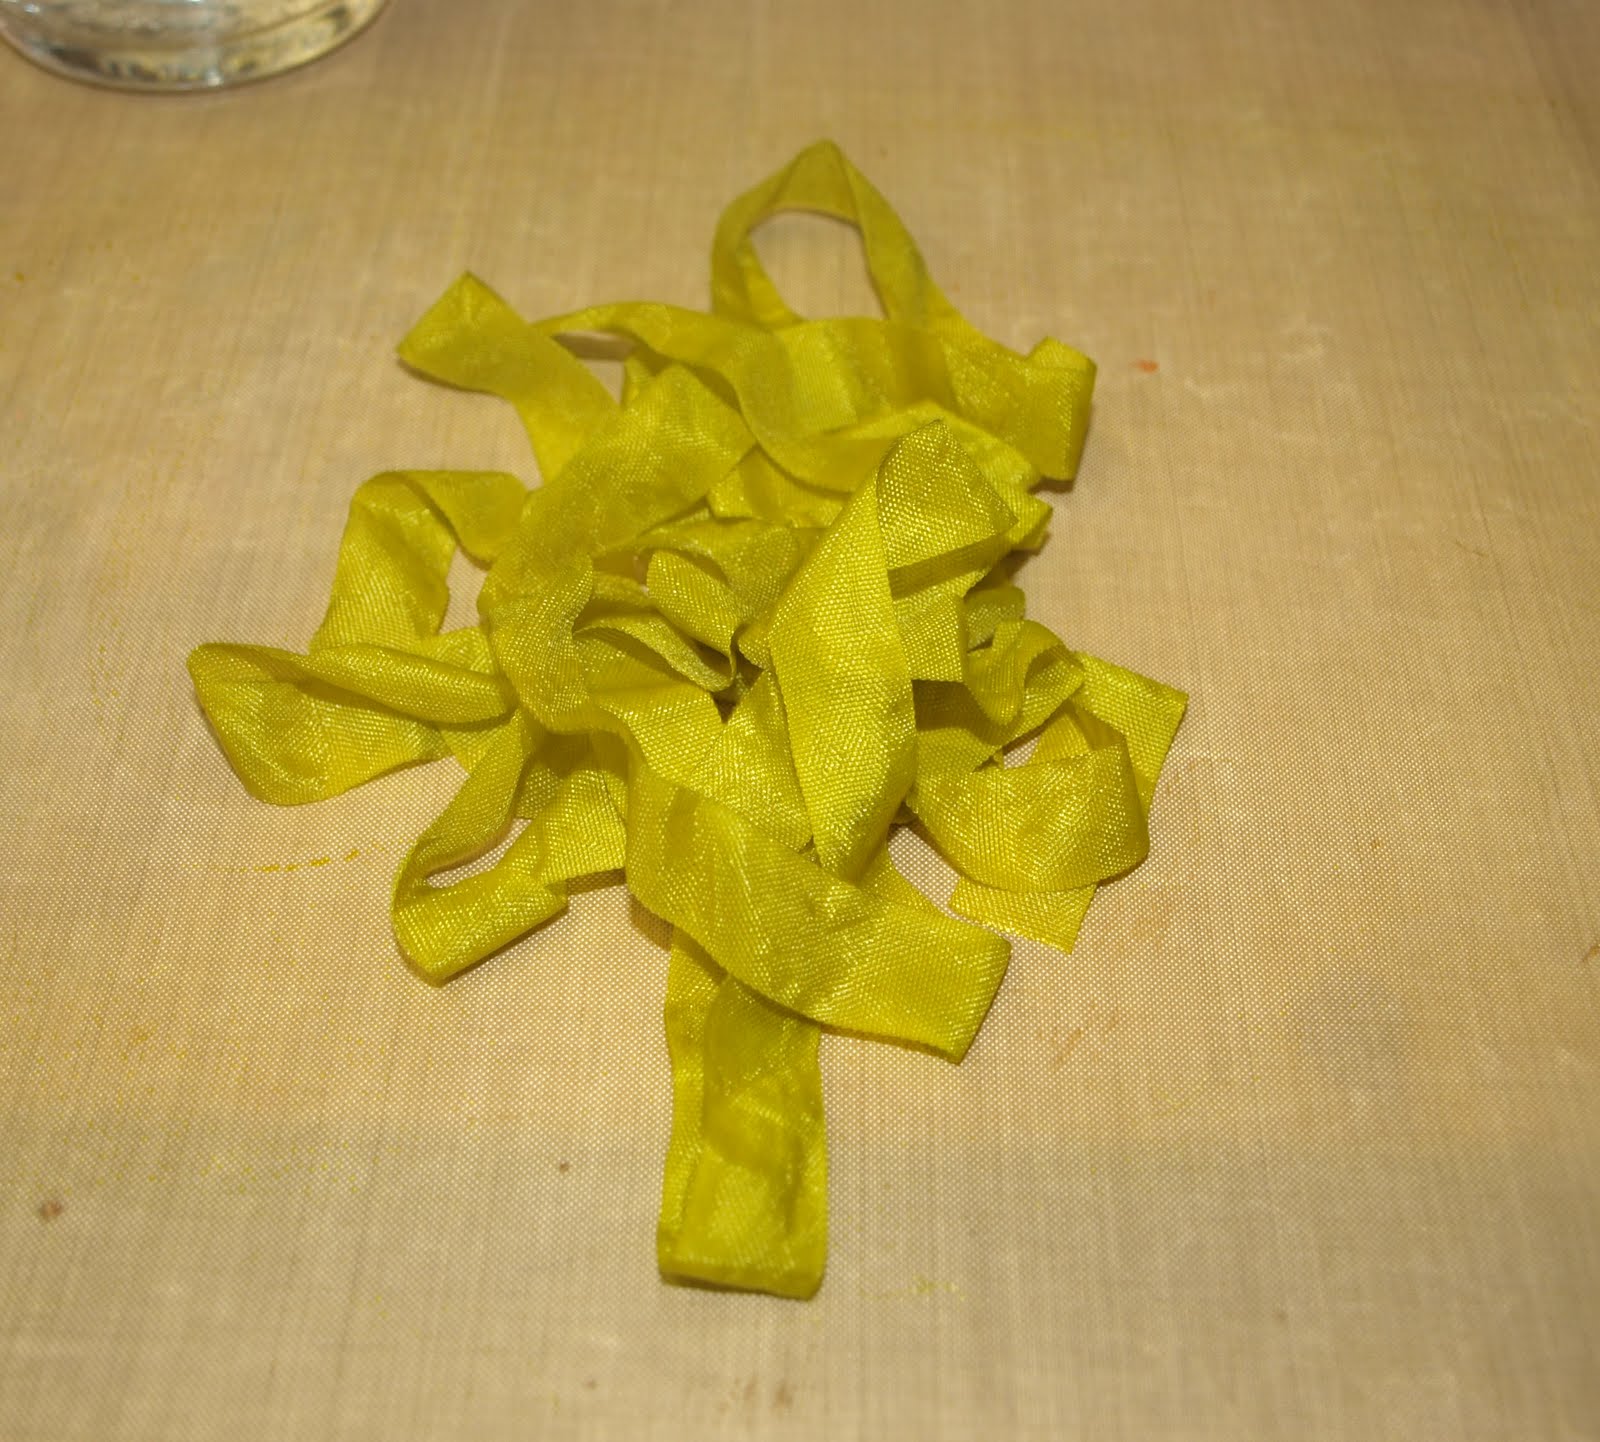
In this tutorial I used the new Crushed Olive Reinker from Tim Holtz. As you can see the color comes out kinda light so you'll want to spritz away until your color appeals to you..... Step 3: Keep turning the ribbon making sure you get all of it sprayed so you leave no white spots unless you like that sort of thing. Some do.. but I don't it bugs me to look 1/2 finished.I take ribbon and rub it all over my craft mat to pick up the excess spray so I don't end up wasting 1/2 a bottle on my mat that will be cleaned up and tossed in the garbage.

Step 4: When your color is achieved, ball your ribbon up and stuff it into the very corner of a plastic baggie... This will help ad crinkles and creases to the dried ribbon.
Step 5: Using a paper piercer or needle, poke holes in the baggie to ventilate so in case you forget to take the ribbon out of the baggie for a couple days, you're less likely to have musty or moldy ribbon. (BIG thing!!! Don't forget!)Step 6: Cut the very tip of the baggie off for even more air flow. The ribbon will NOT dry overnight in a closed plastic baggie no matter what anyone tells you. Wet + no air flow = wet and musty= YUCK!
Step 7: Set aside and take the ribbon out the next day. Note.. The ribbon will not be totally dry when you take it out of the baggie. I just take mine out and kind of loosely undo the "wad o ribbon" and let it air dry another night. You can heat set it with a heat tool but this may relax the ribbon and not leave you with the crinkles.. SO.. if you like crinkles.. don't heat it.. If you want it flat, heat away. And you can even iron it at that point if you want it flat.

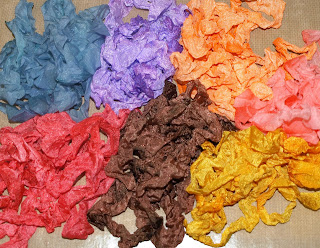
So I'm sure some of you are asking.. What colors have I tried? Well.. Here's a picture of some I made yesterday.. Note these are not 100% dry but they are done up through step 7.

Blue: Distress Ink in Tumbled Glass with some Adirondak in Stone Wash
Purple: Close To My Heart Hydrangea
Orange: Orange Brilliance (has a pearl shine)
Pink: Distress Ink in Spun Sugar
Red: Cherry Red by Memories
Brown: CTMH Chocolate
Yellow: Wild Honey Distress Ink (this is my new favorite color!)
I hope you'll try out my tutorial. I'd love to see what you make!
Now go get inky! :)